
a lifestyle blog about motherhood, intention, whimsical moments, and wellness
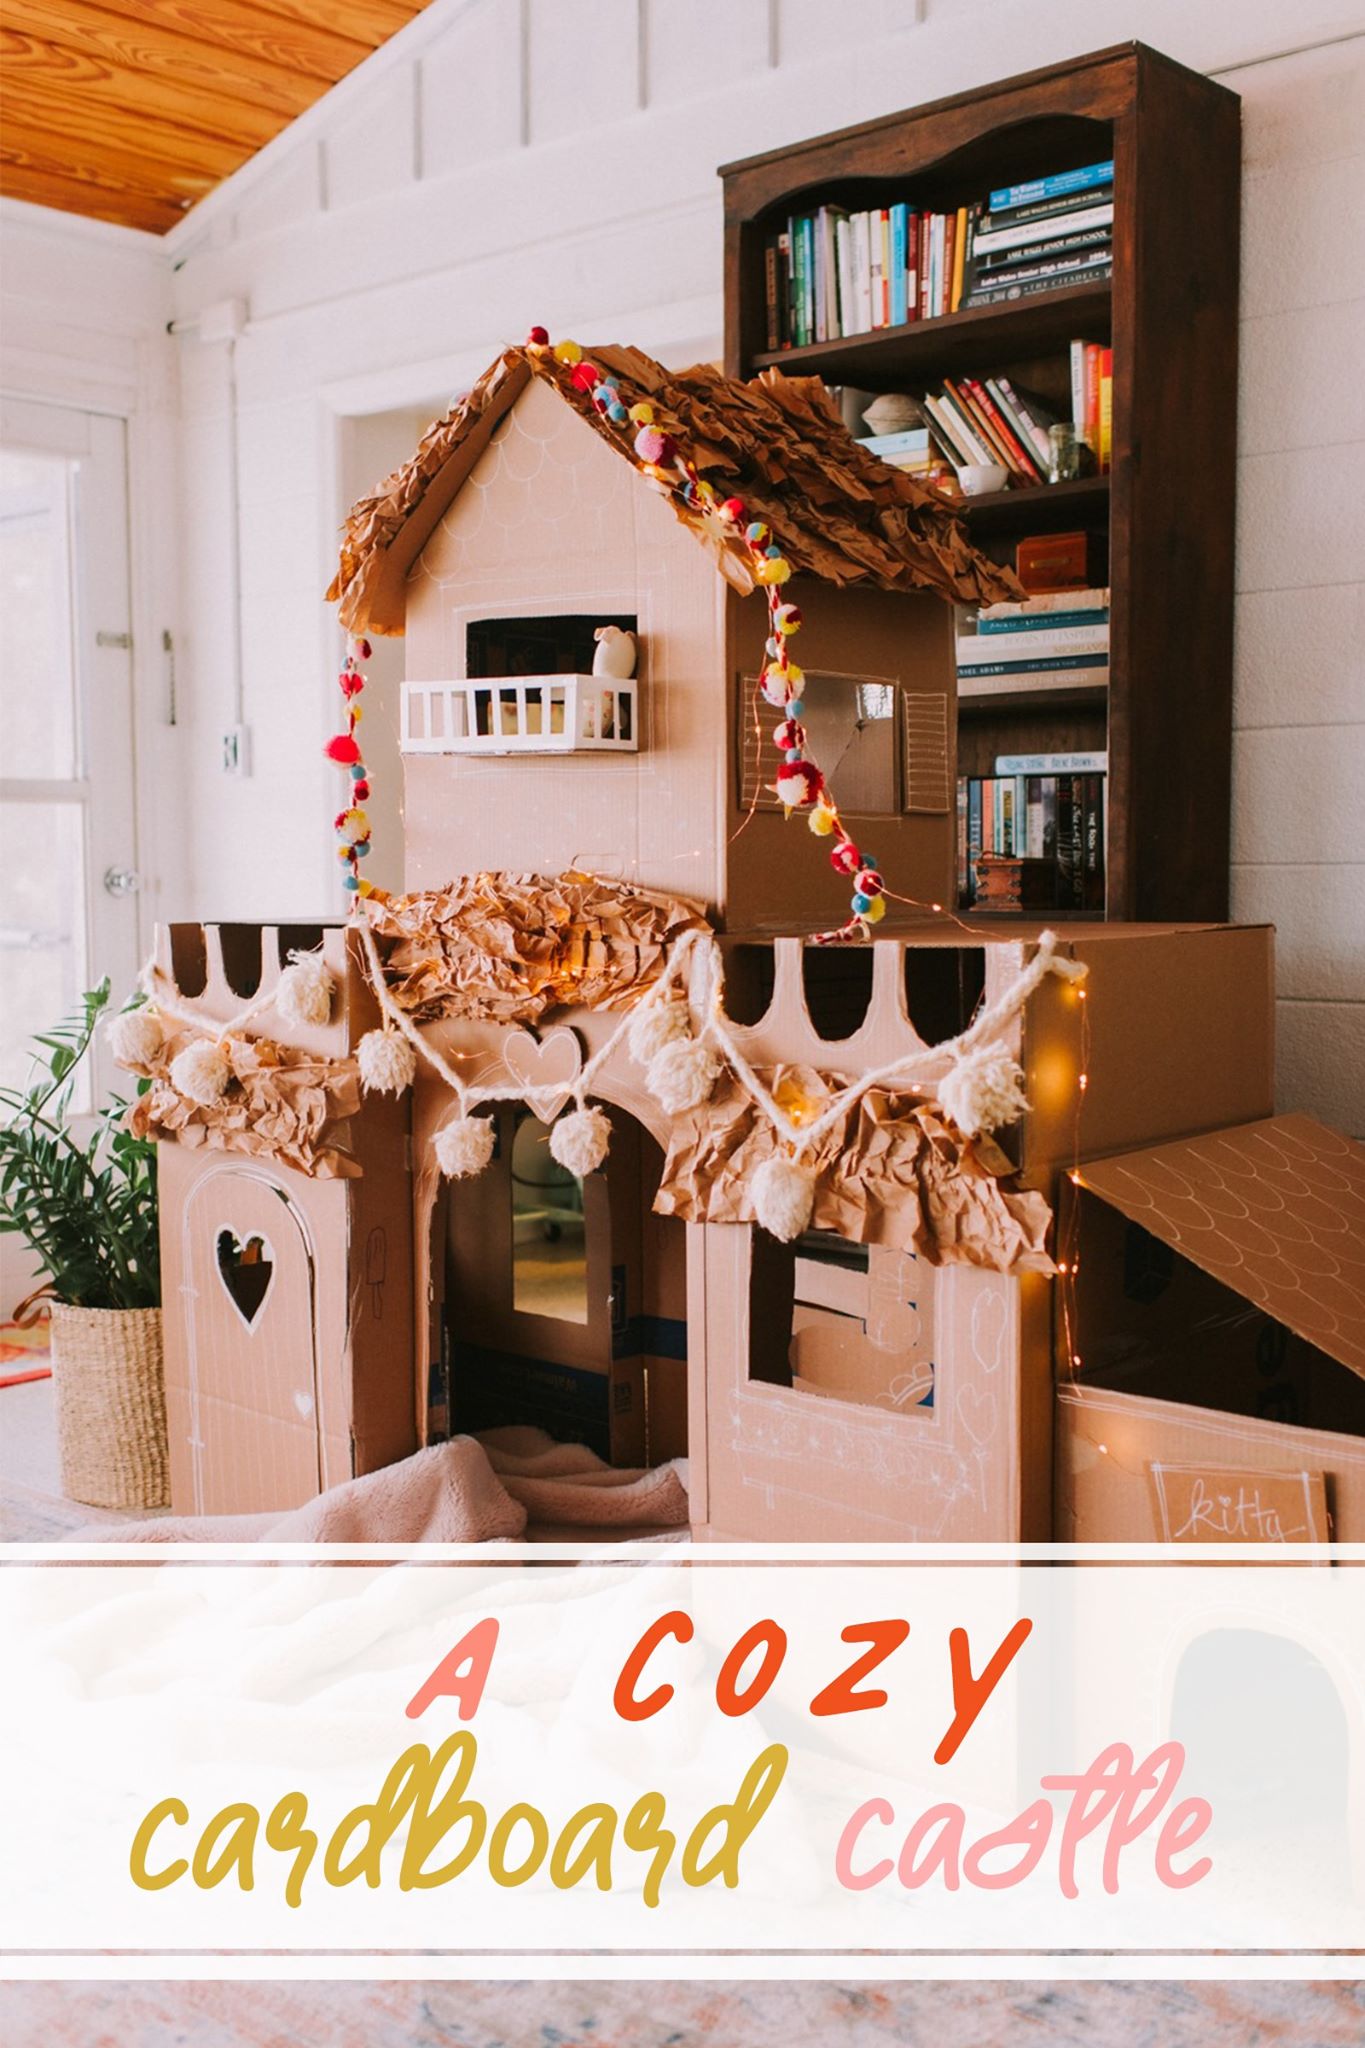
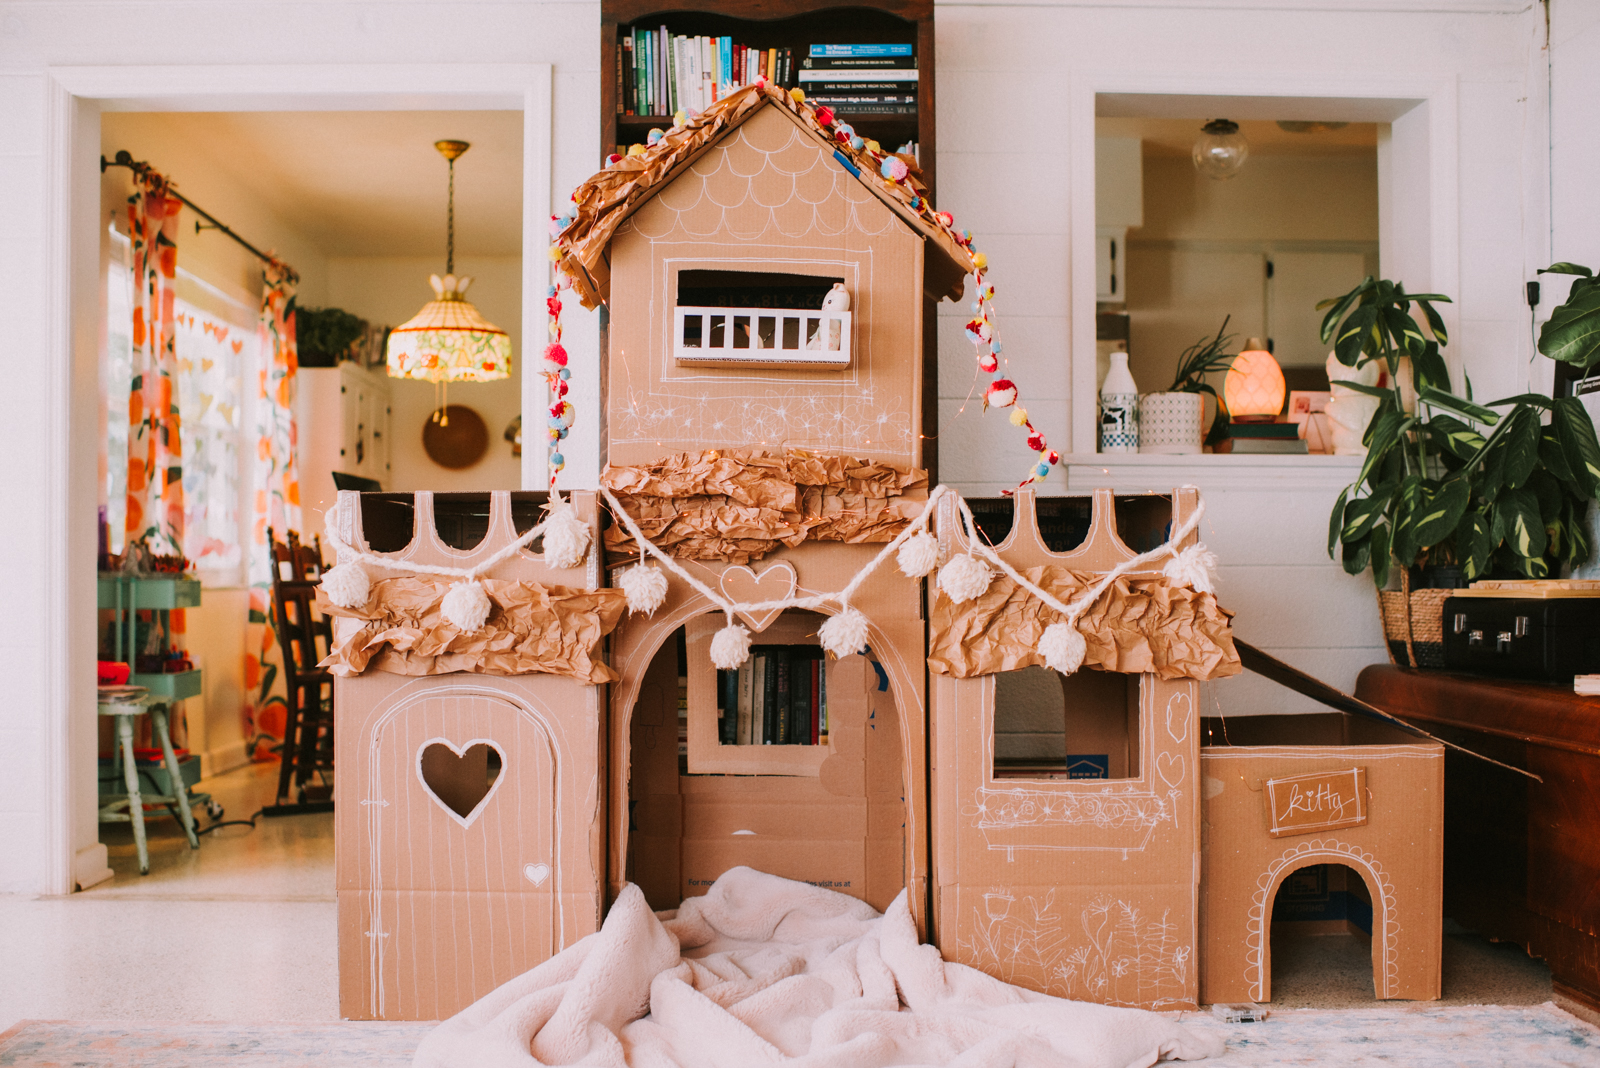
Creating a Cozy Cardboard Castle
")
Lexi Wharem is a mother and photographer based in Lake Wales, Florida. She can be found on instagram sharing pieces of her life and work as she chases her dreams of being an visual storyteller.
Get ready to impress your kids with this pretty epic rainy day project! Even my five year old proclaimed me “the best builder in the world” mid-way through construction, and our cozy abode is still going strong after a few days of play!
Two places we found inspiration for this idea was Here and Here! Check out their cute cardboard houses too!
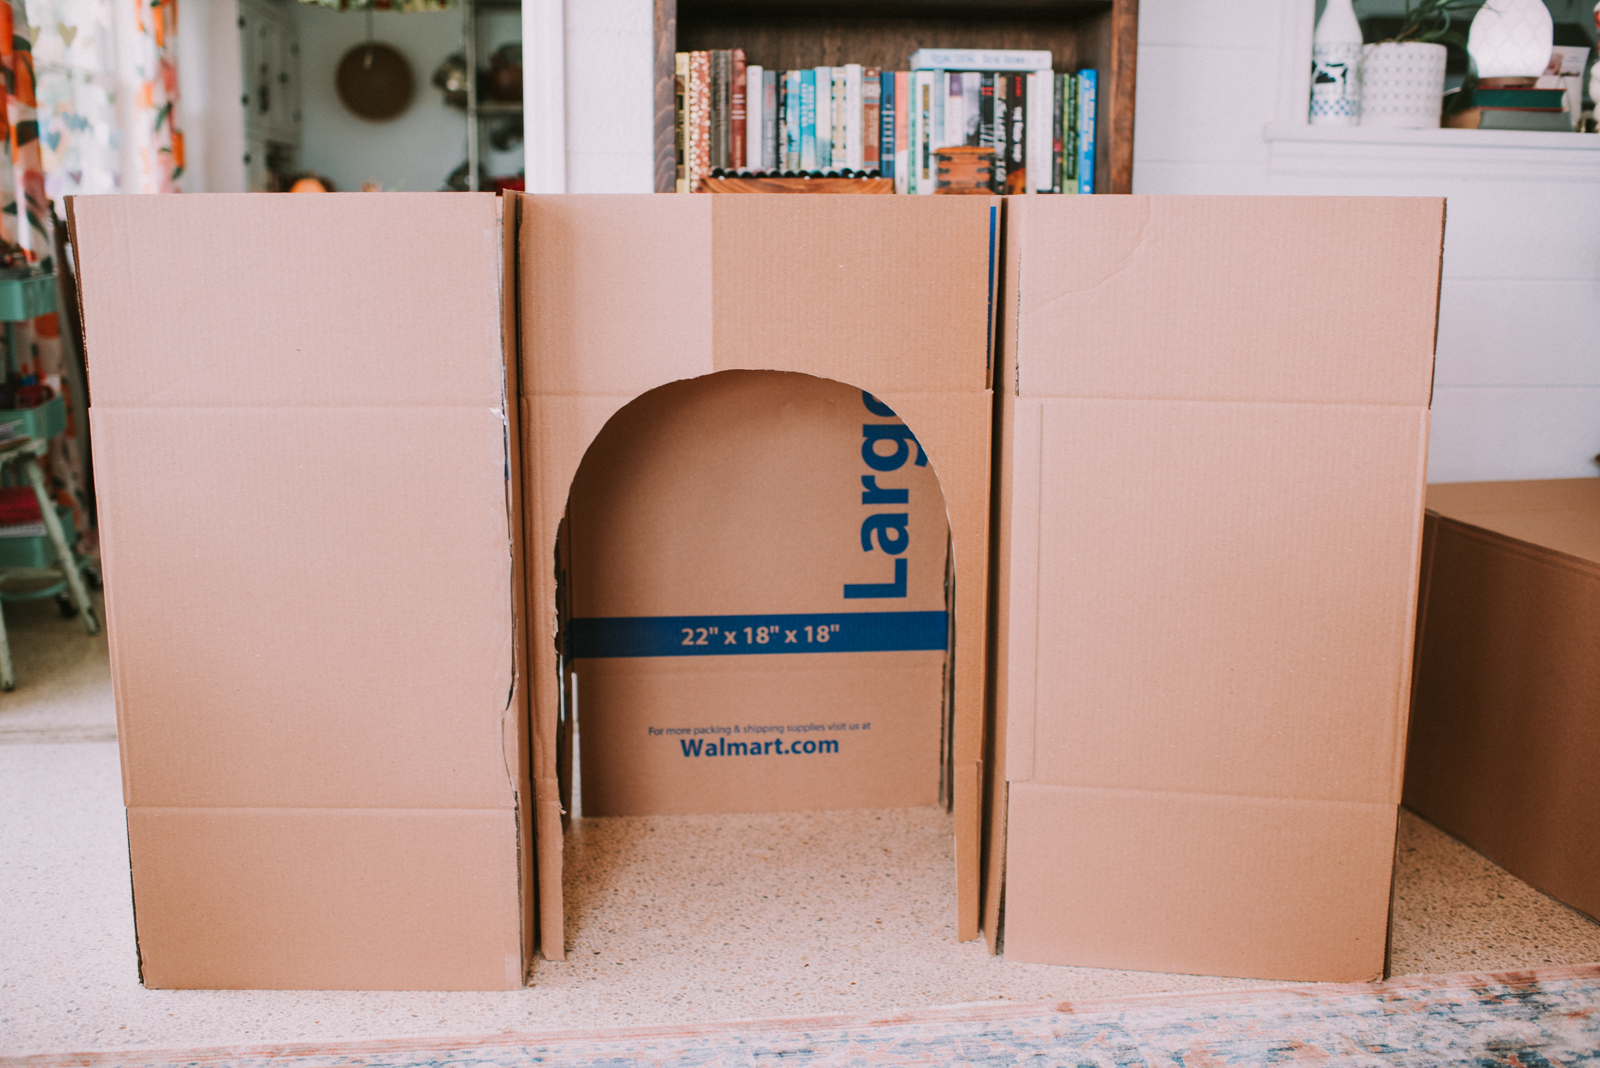
To construct your own cardboard castle (or cottage!) you’ll need to pull together a few supplies, namely cardboard boxes, clear packing tape, box cutters, and a white chalk marker. I saved shipping boxes and some kraft paper packaging, but in the end I also ended up purchasing some large shipping boxes from Walmart, using 5-6 boxes total to complete our structure.

Once you’ve pulled your supplies together you’ll want to take a few minutes to sketch out a basic idea of what your castle will look like. You will come back to this blueprint as you work, giving you a basic visual for where and what to cut and tape. Keep it simple because you can always add more details after you get your boxes assembled and all your doors and windows cut out.
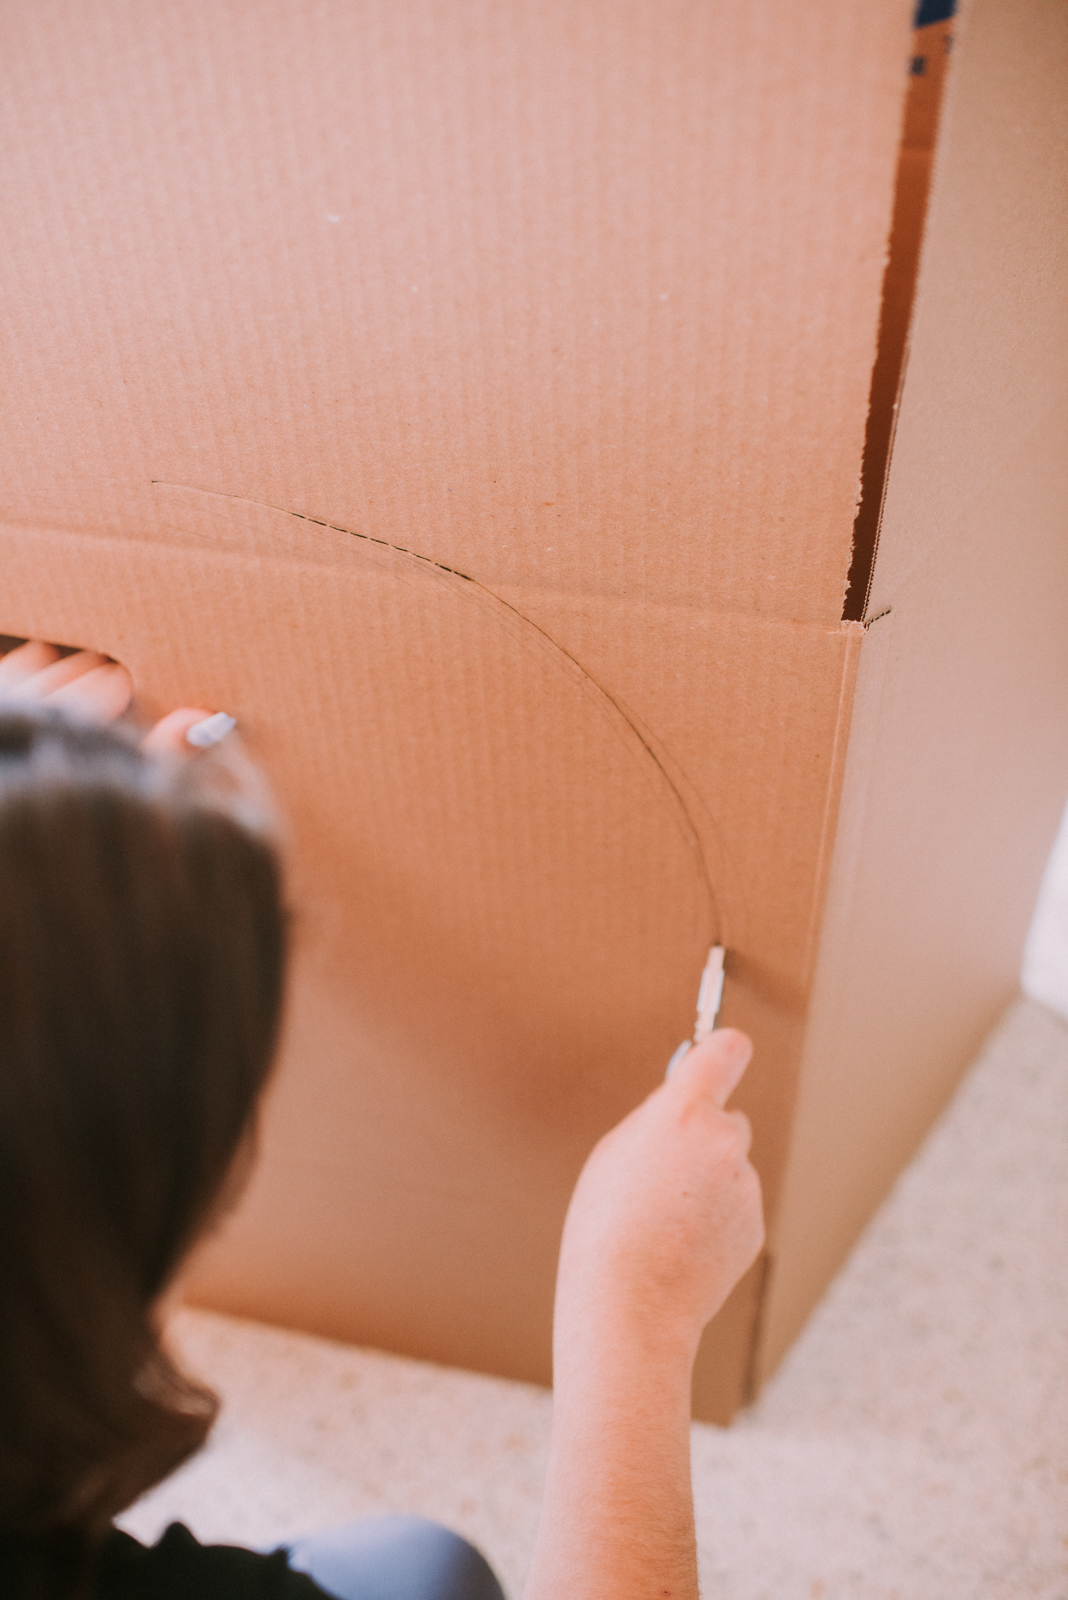
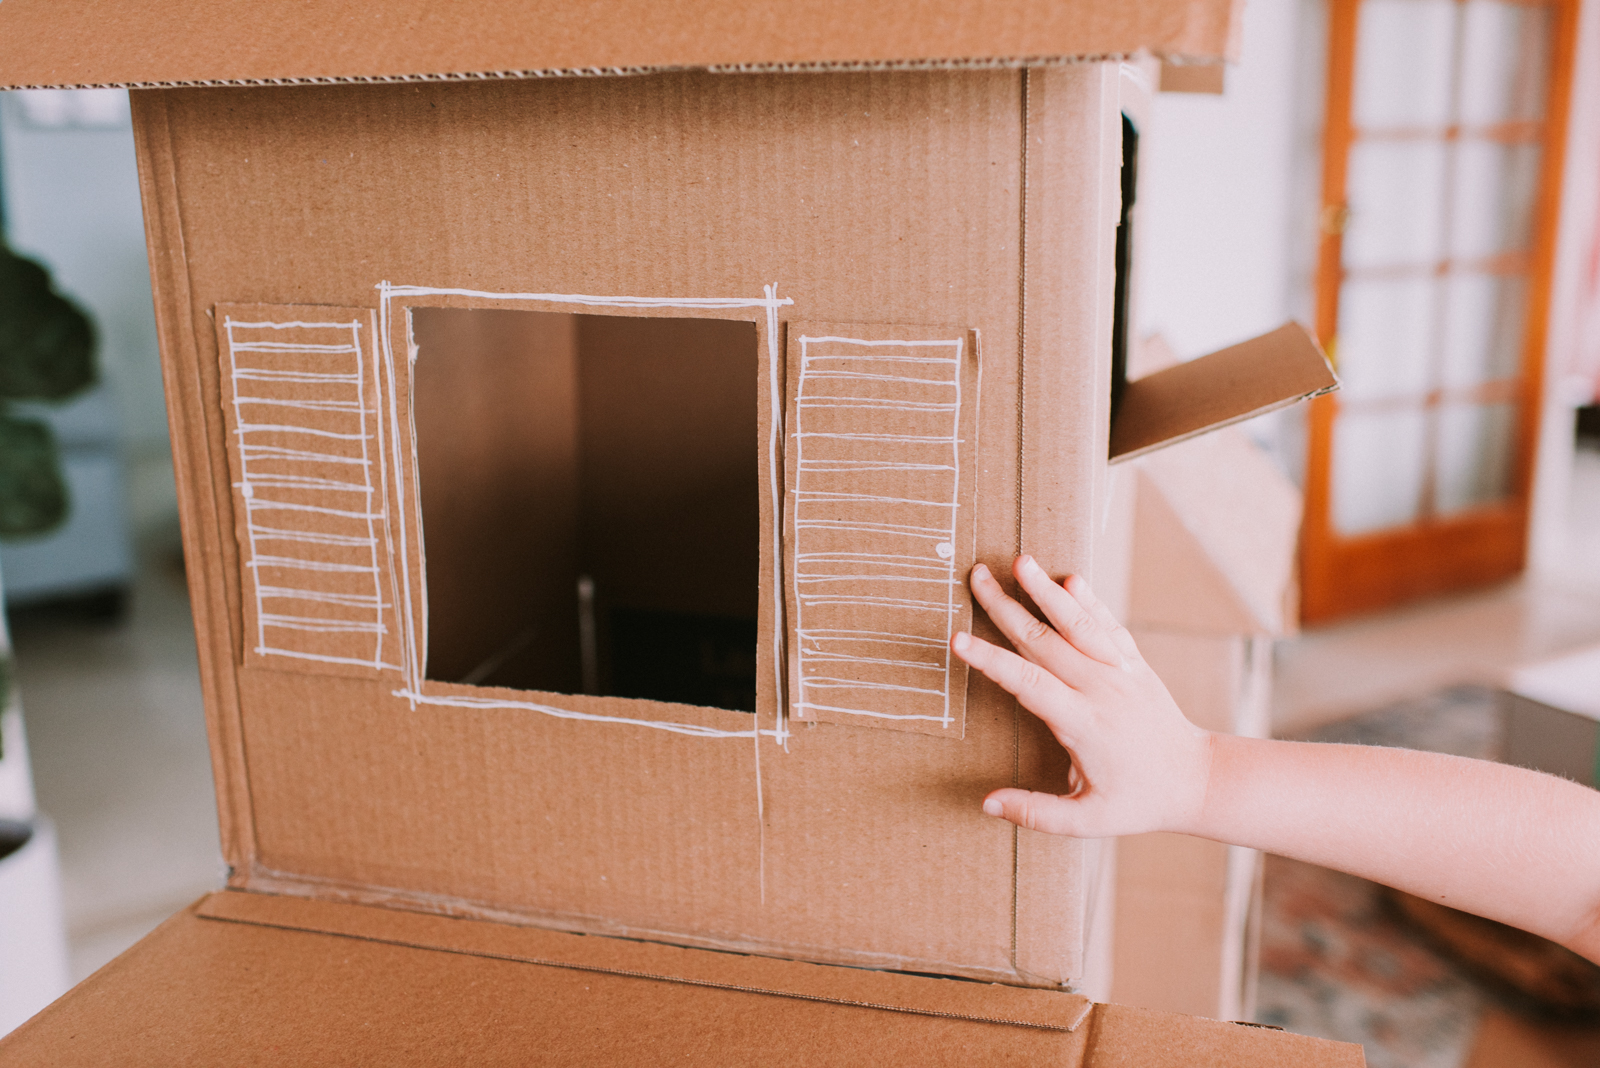
Start by sketching out and cutting your major openings. You can cut the entire opening out, or leave one edge uncut and just fold along it to create a door. I did both to create variety on my exterior.
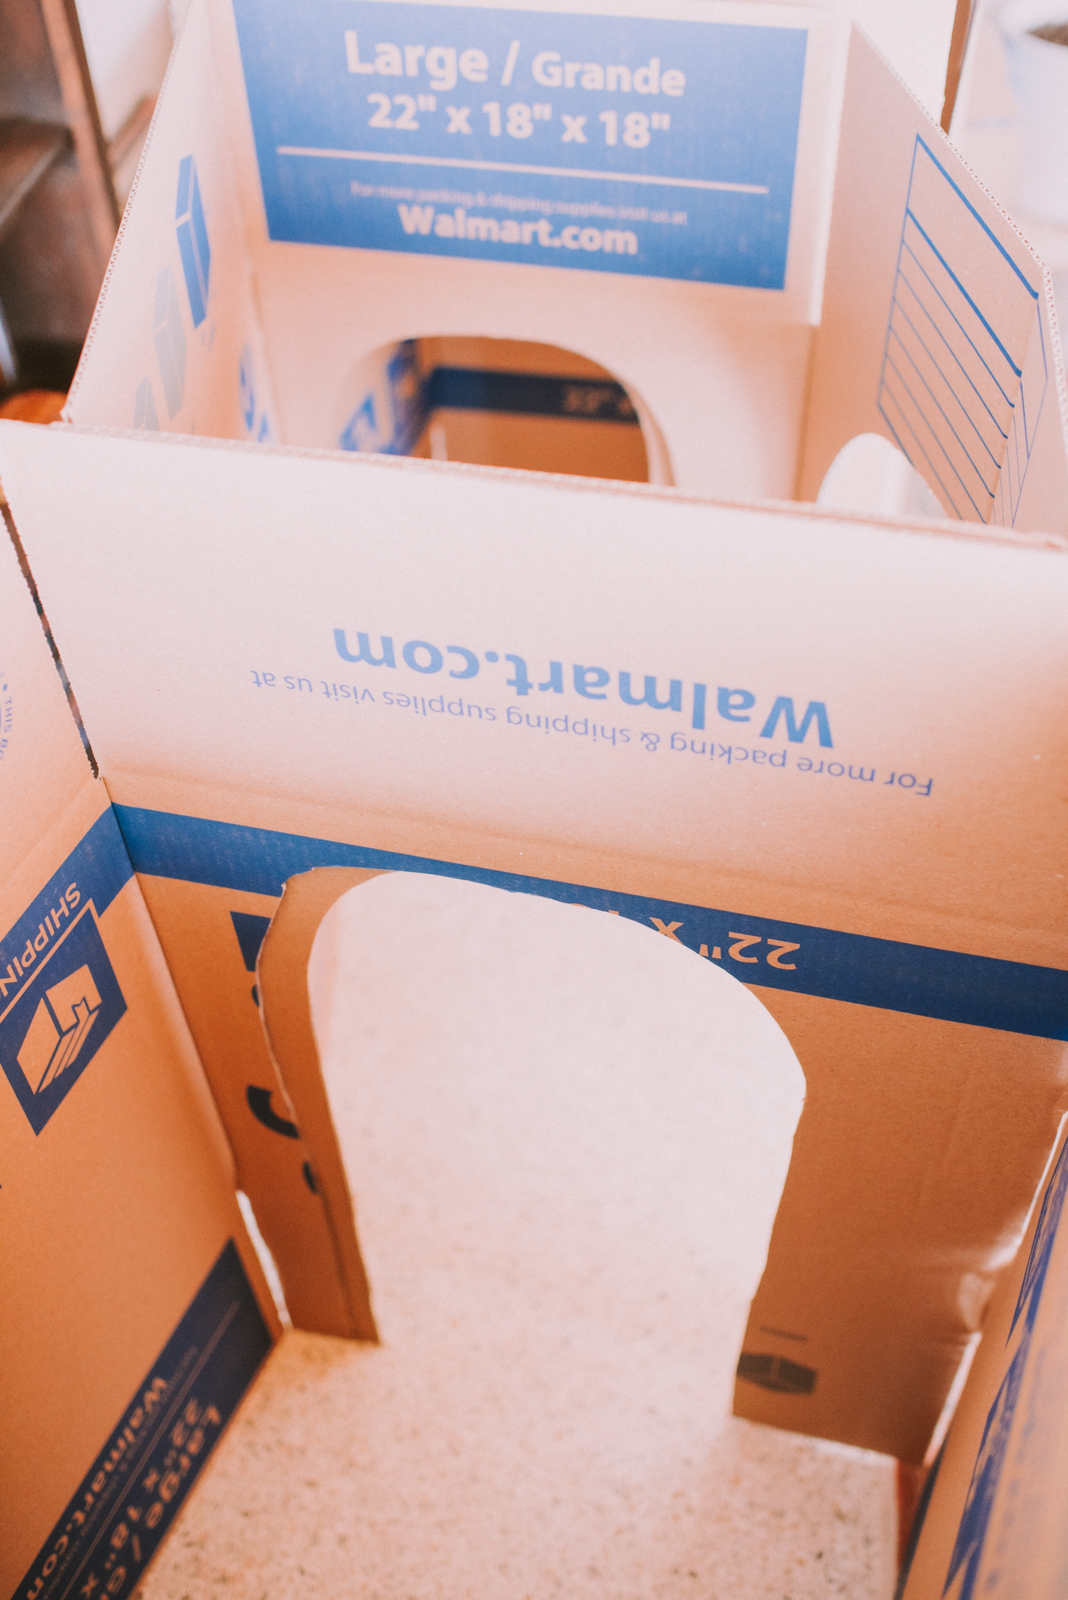
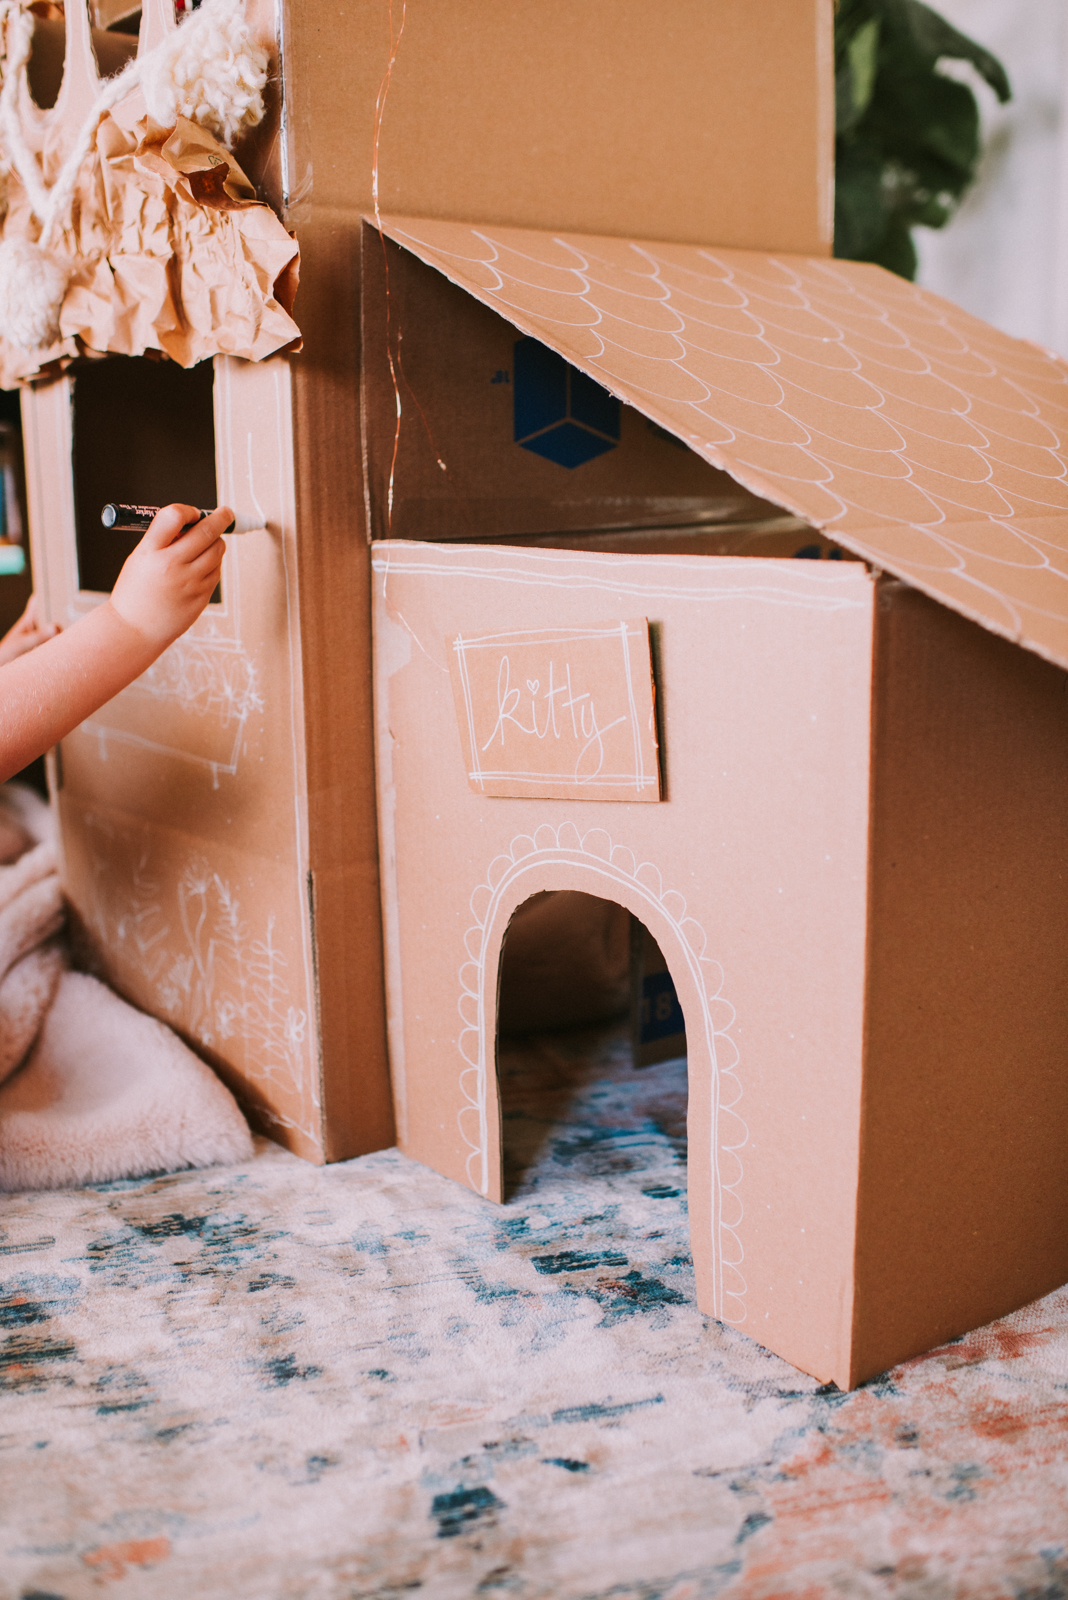
To allow for movement within the structure you will want to cut out archways where you attach your boxes together. Cut one out, then use the cutout as your template for the other box, so your openings will match up once you tape your boxes together.
Once your interior archways are cut out you will want to start taping your boxes together. I started by adding my second story box to my middle section, then attached the two side boxes to that main column. I staggered mine a little in the front to give the facade more interest, but you can do whatever you want here!
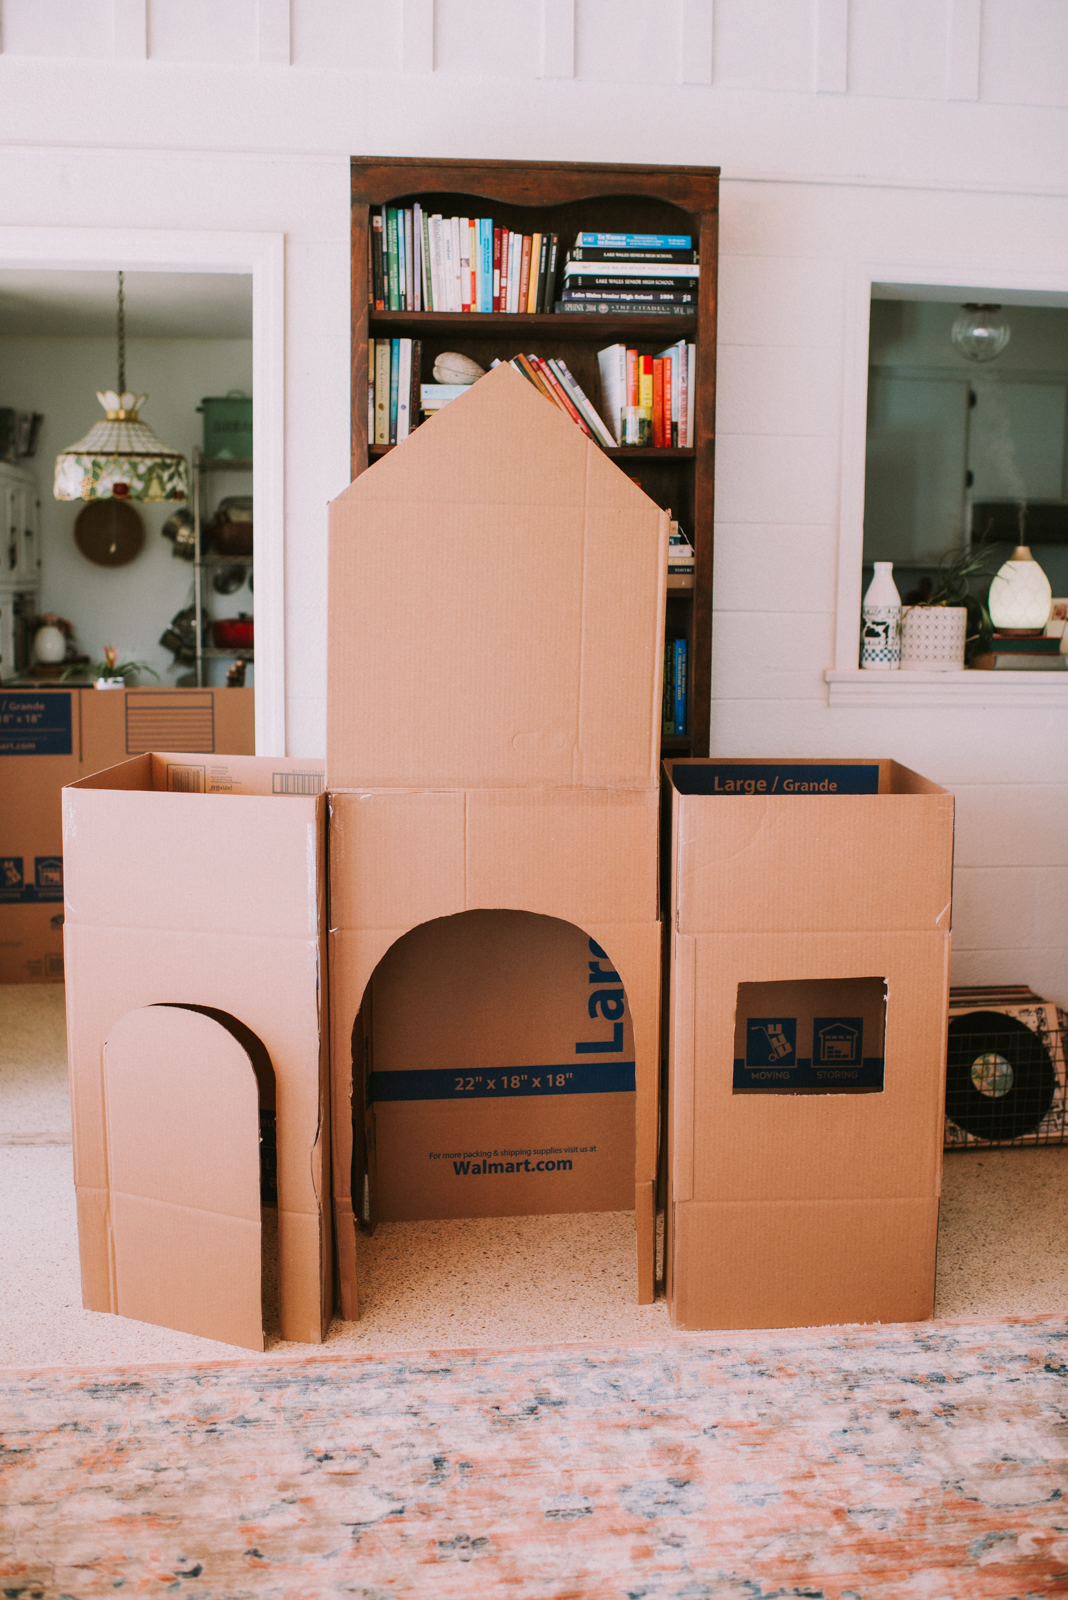
Once I finished taping my main box structure together, I got to work cutting out the rest of the doors and windows. Whenever I worried about lines or arches not being perfect, I just reminded myself that the imperfections are what will make it feel even more homey!
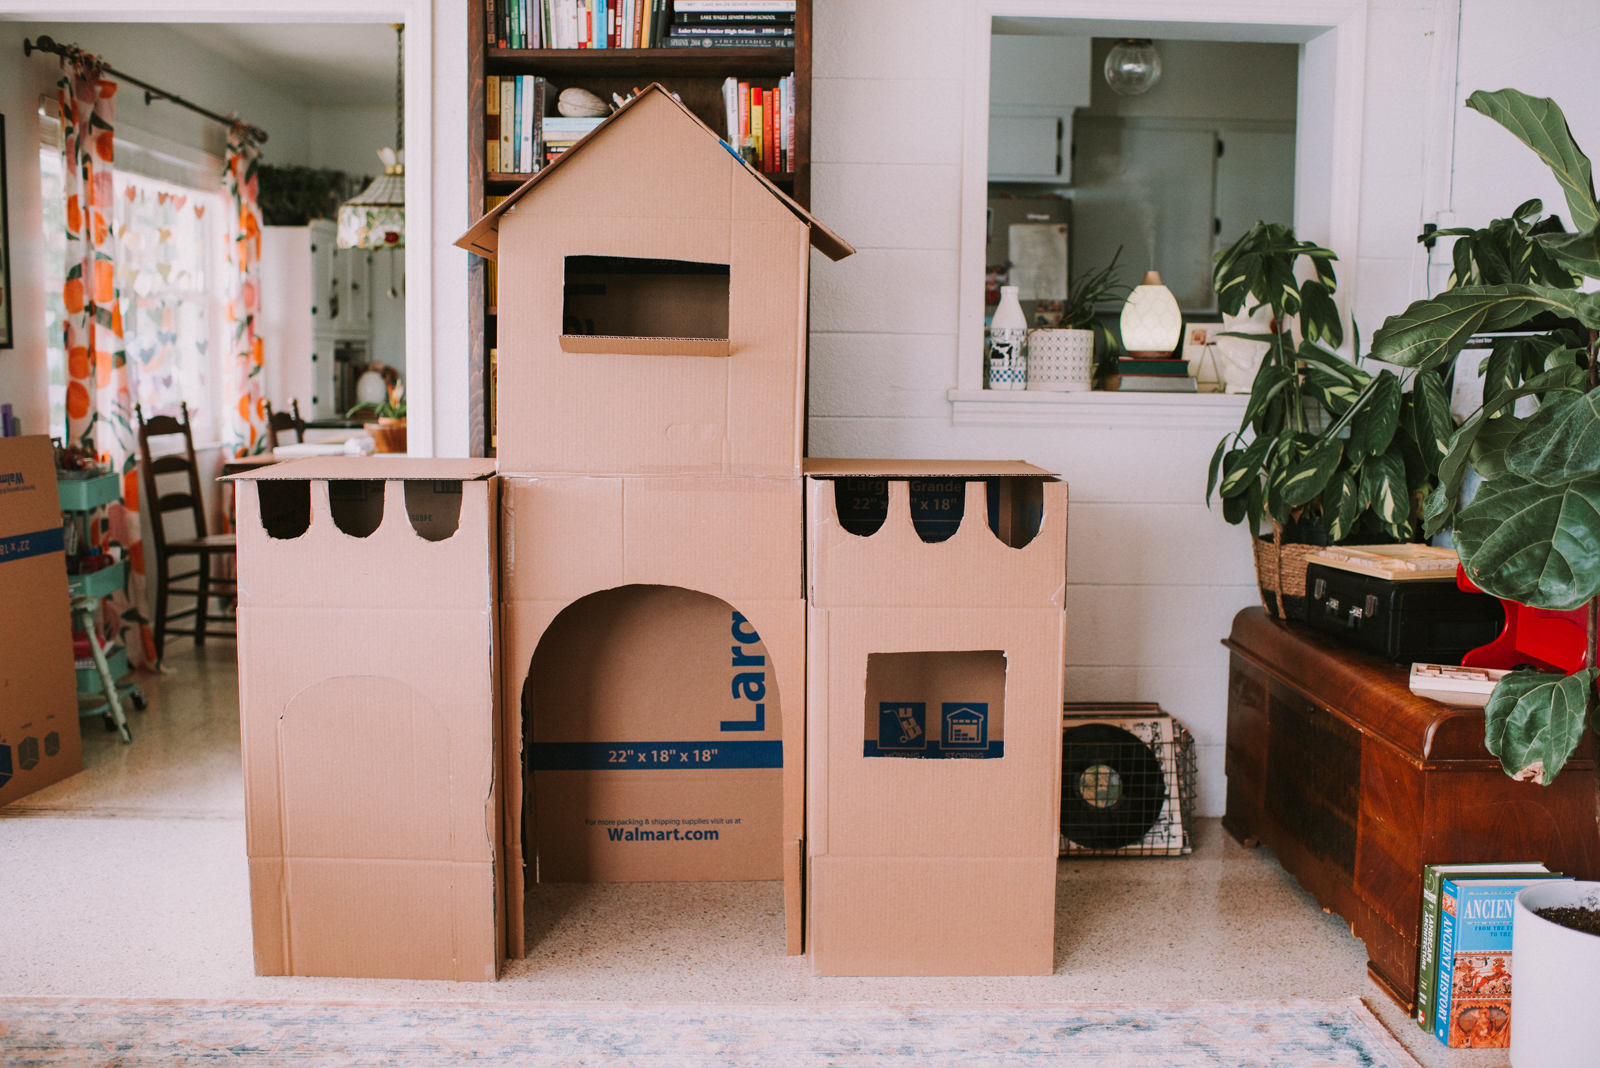
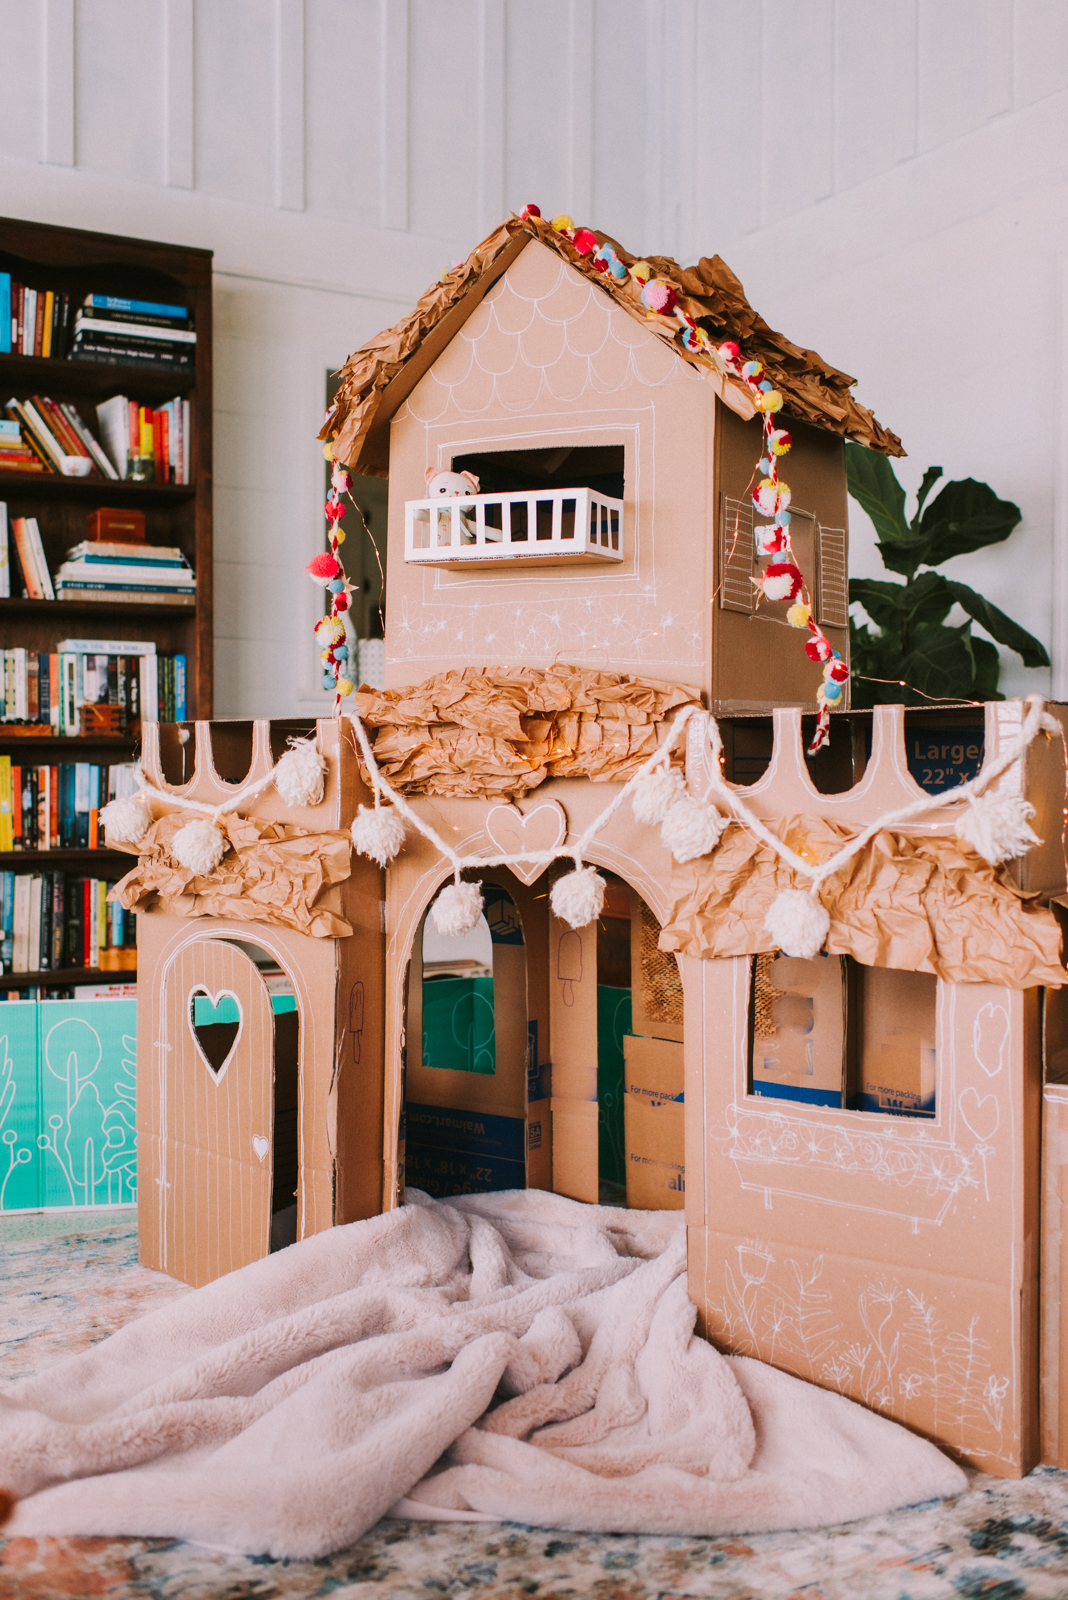
After all your boxes are secured together you can start adding your roof pieces and cut out any other windows, balconies, or doors you may want. I kept adding more as I went, thinking extra access and light could only help its functionality, especially along the back side, BUT you could totally just keep it plain and focus all your attention on the front facade. No rules, just do what works for you, depending on your level of creative energy!
For some of my windows I saved the cutout piece and created shutters, just to up the cozy factor!
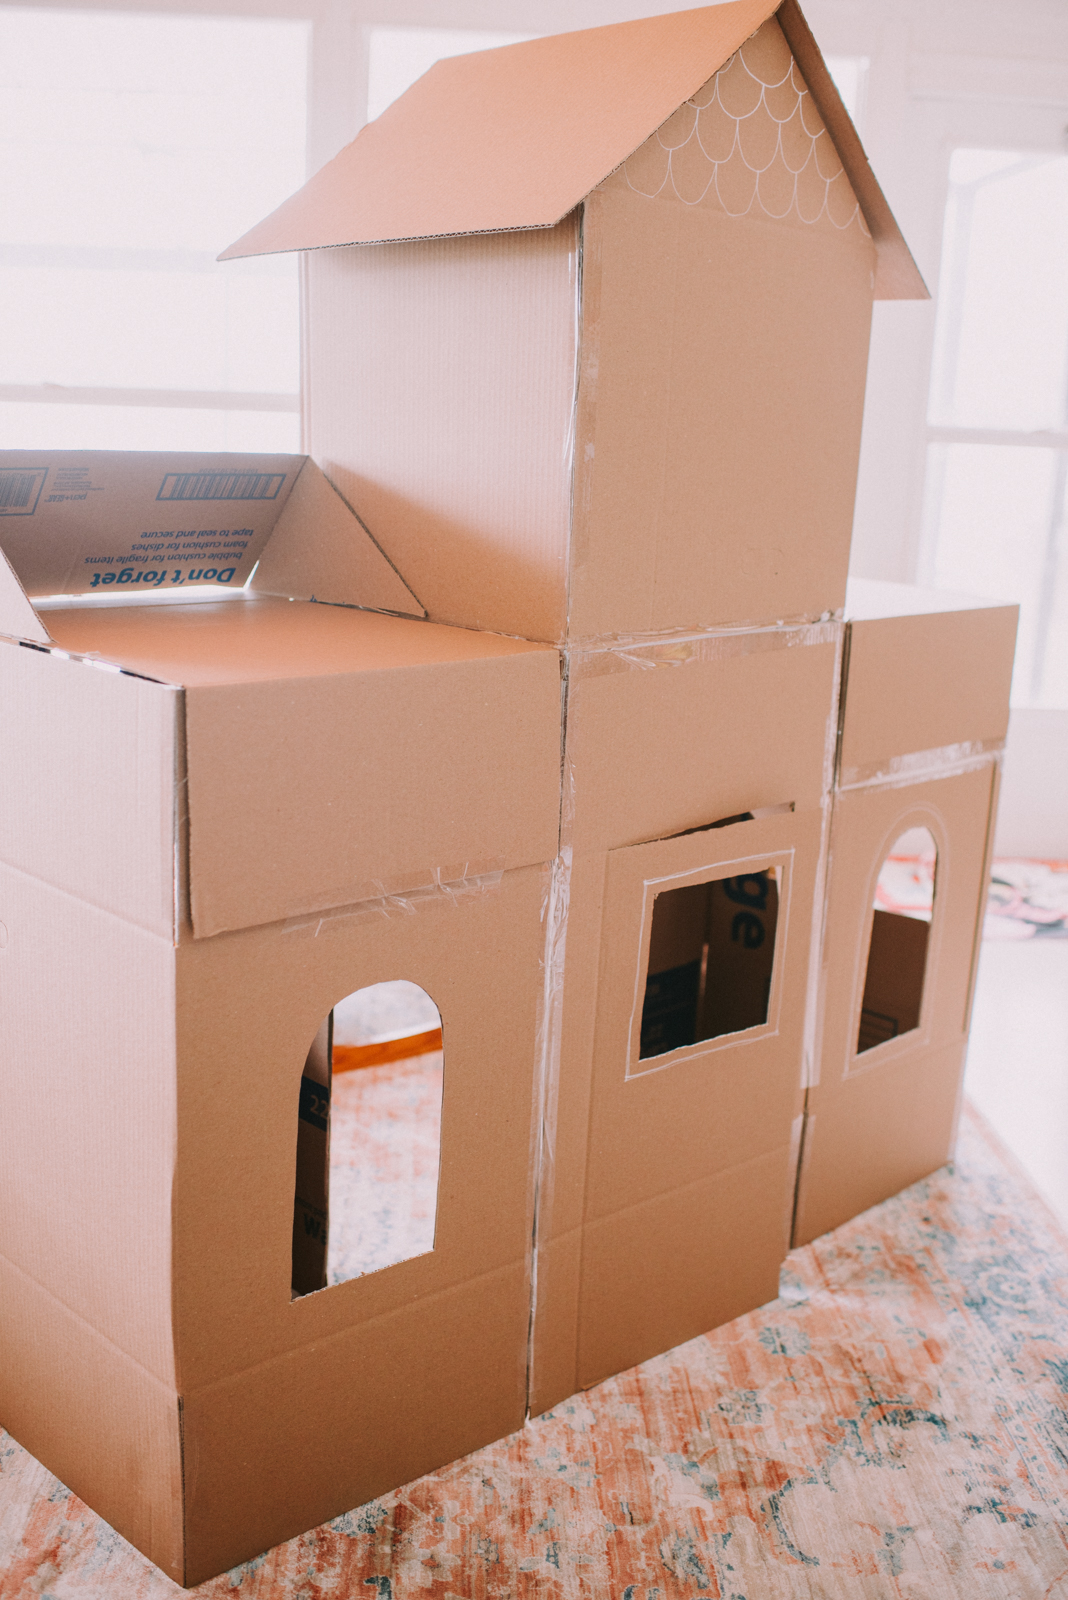
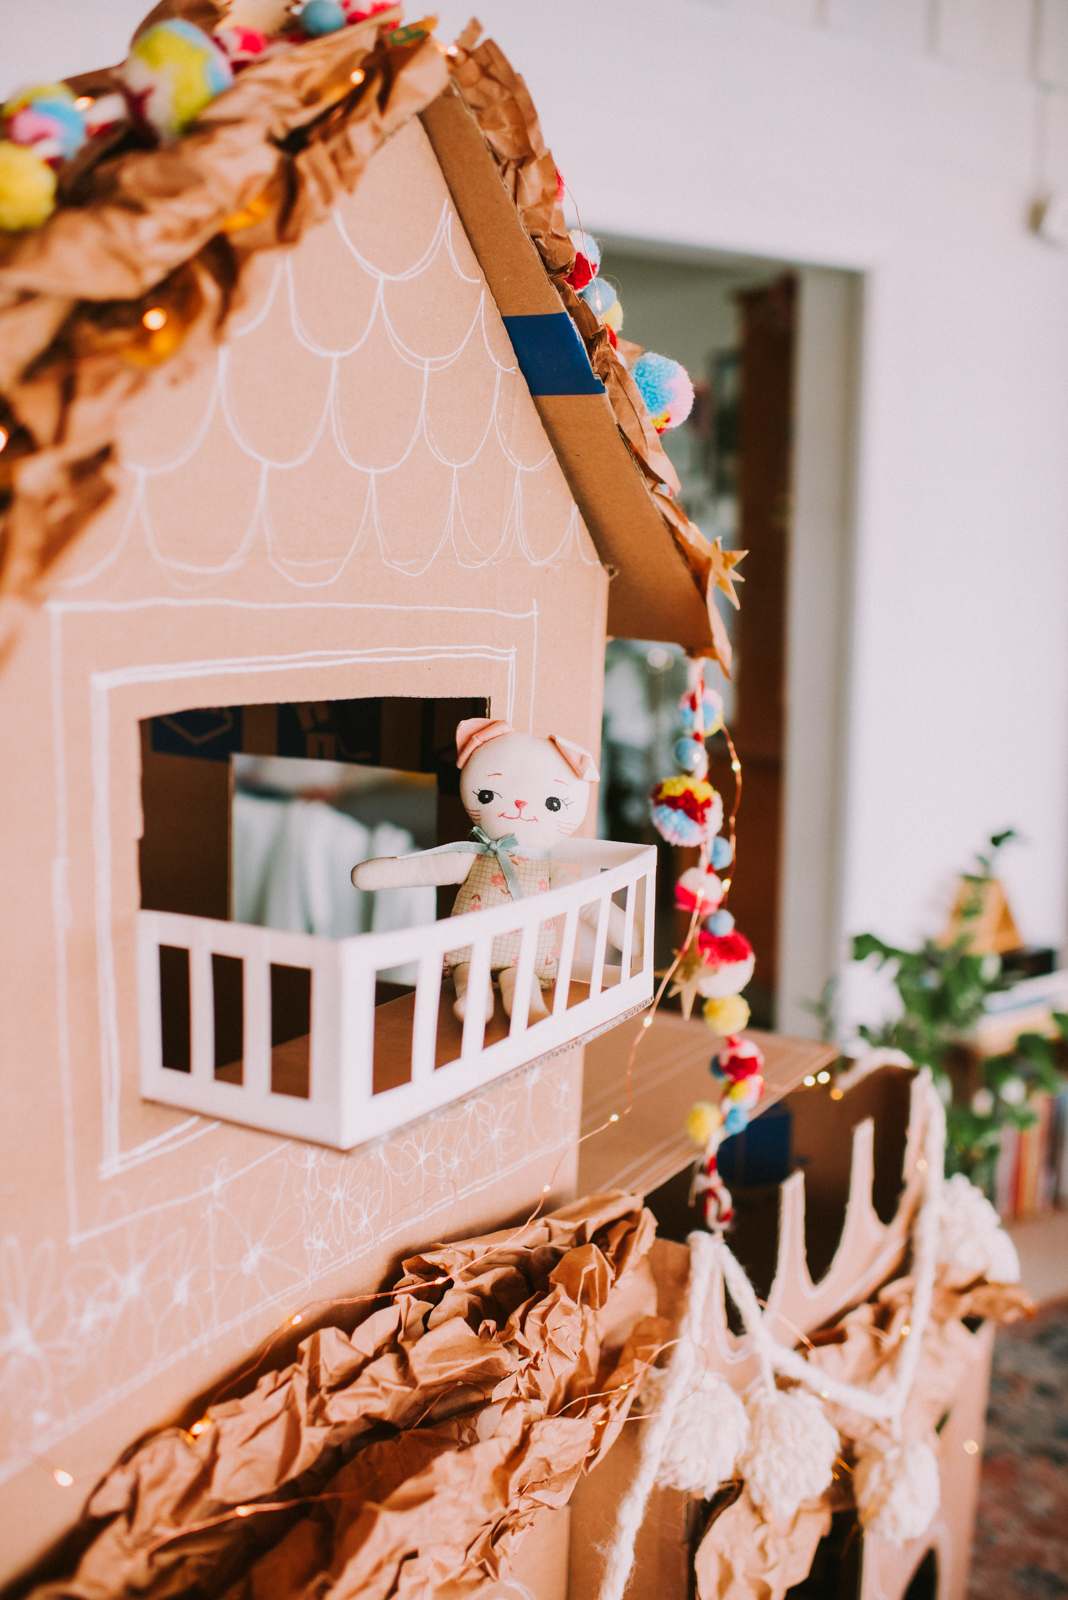
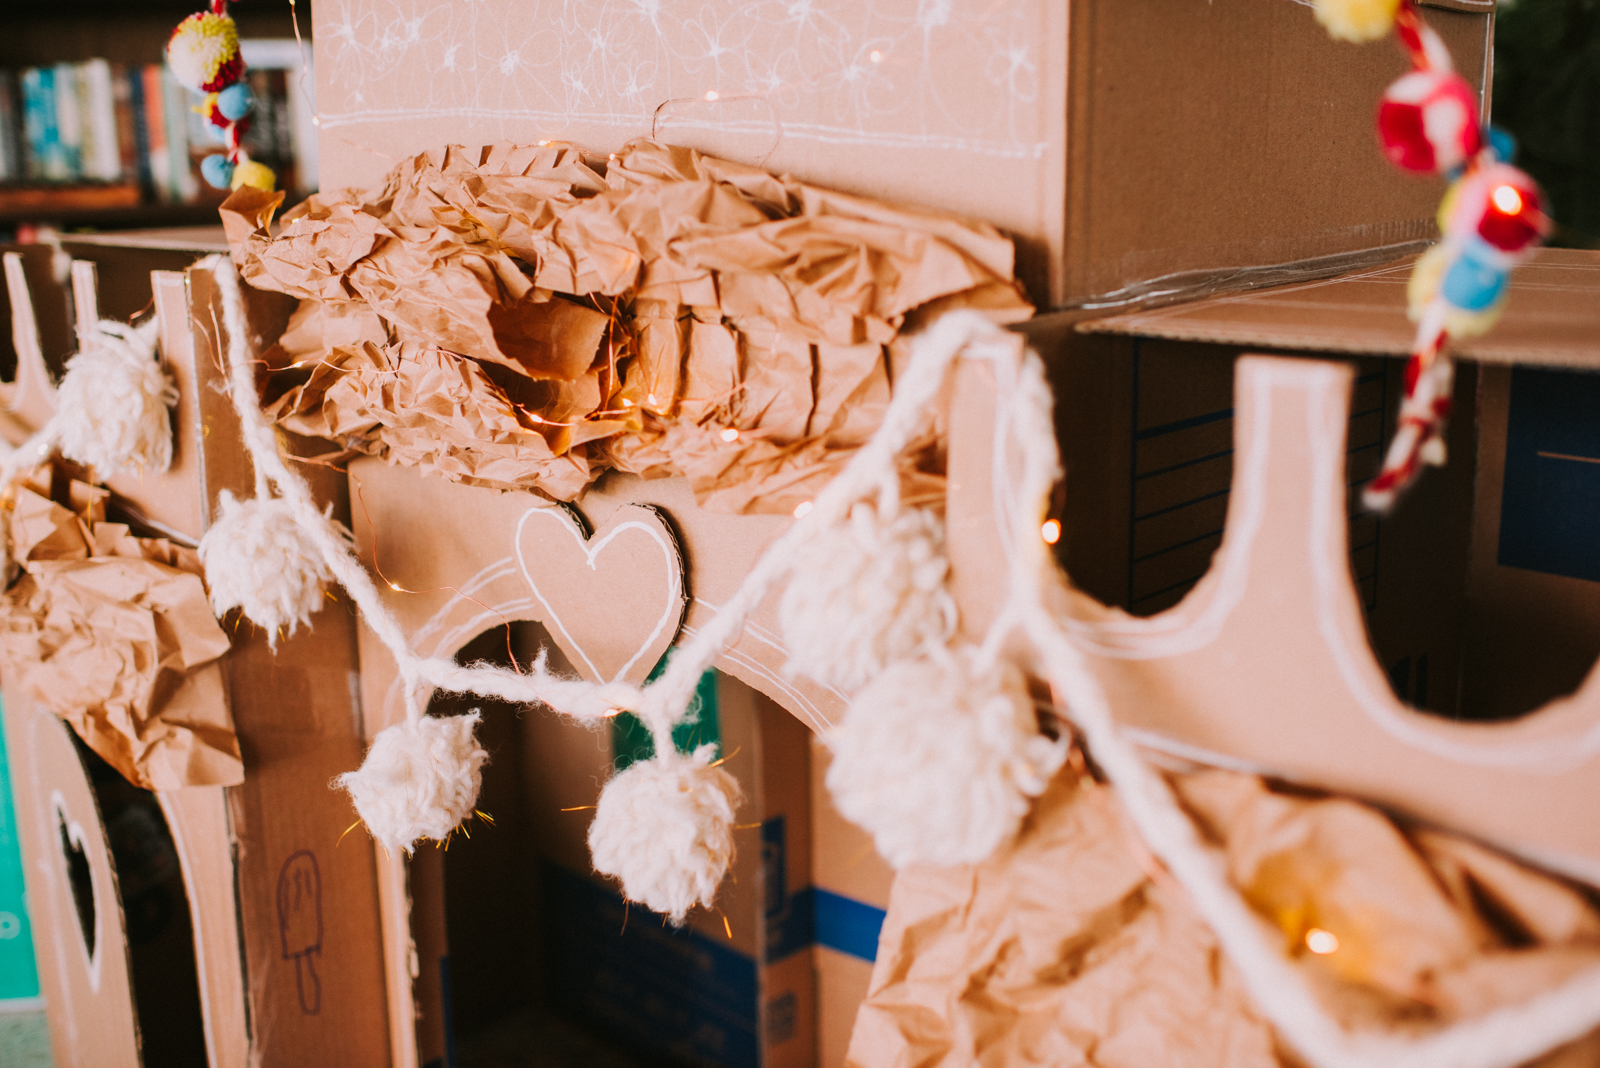
I used the kraft paper packaging I had saved to add some texture and dimension to the roof and along the front facade. You could also crumple up your own paper for this, or just leave it off. Flower boxes with tissue paper flowers would also be pretty and creative, but I just drew them on with my chalk marker. I also added a little balcony for some whimsy and fun!

I added lots of details using the chalk marker, but eventually just handed it off to my kids to go to town with it. They were happy to draw their own hearts and popsicles and make it their own!
To finish off your cozy abode, decorate with whatever flair you have already laying around the house, or just make your own! I added twinkle lights and some strung pom poms and forced myself to stop before I started to add plants, too! Force of habit– I can’t help myself!
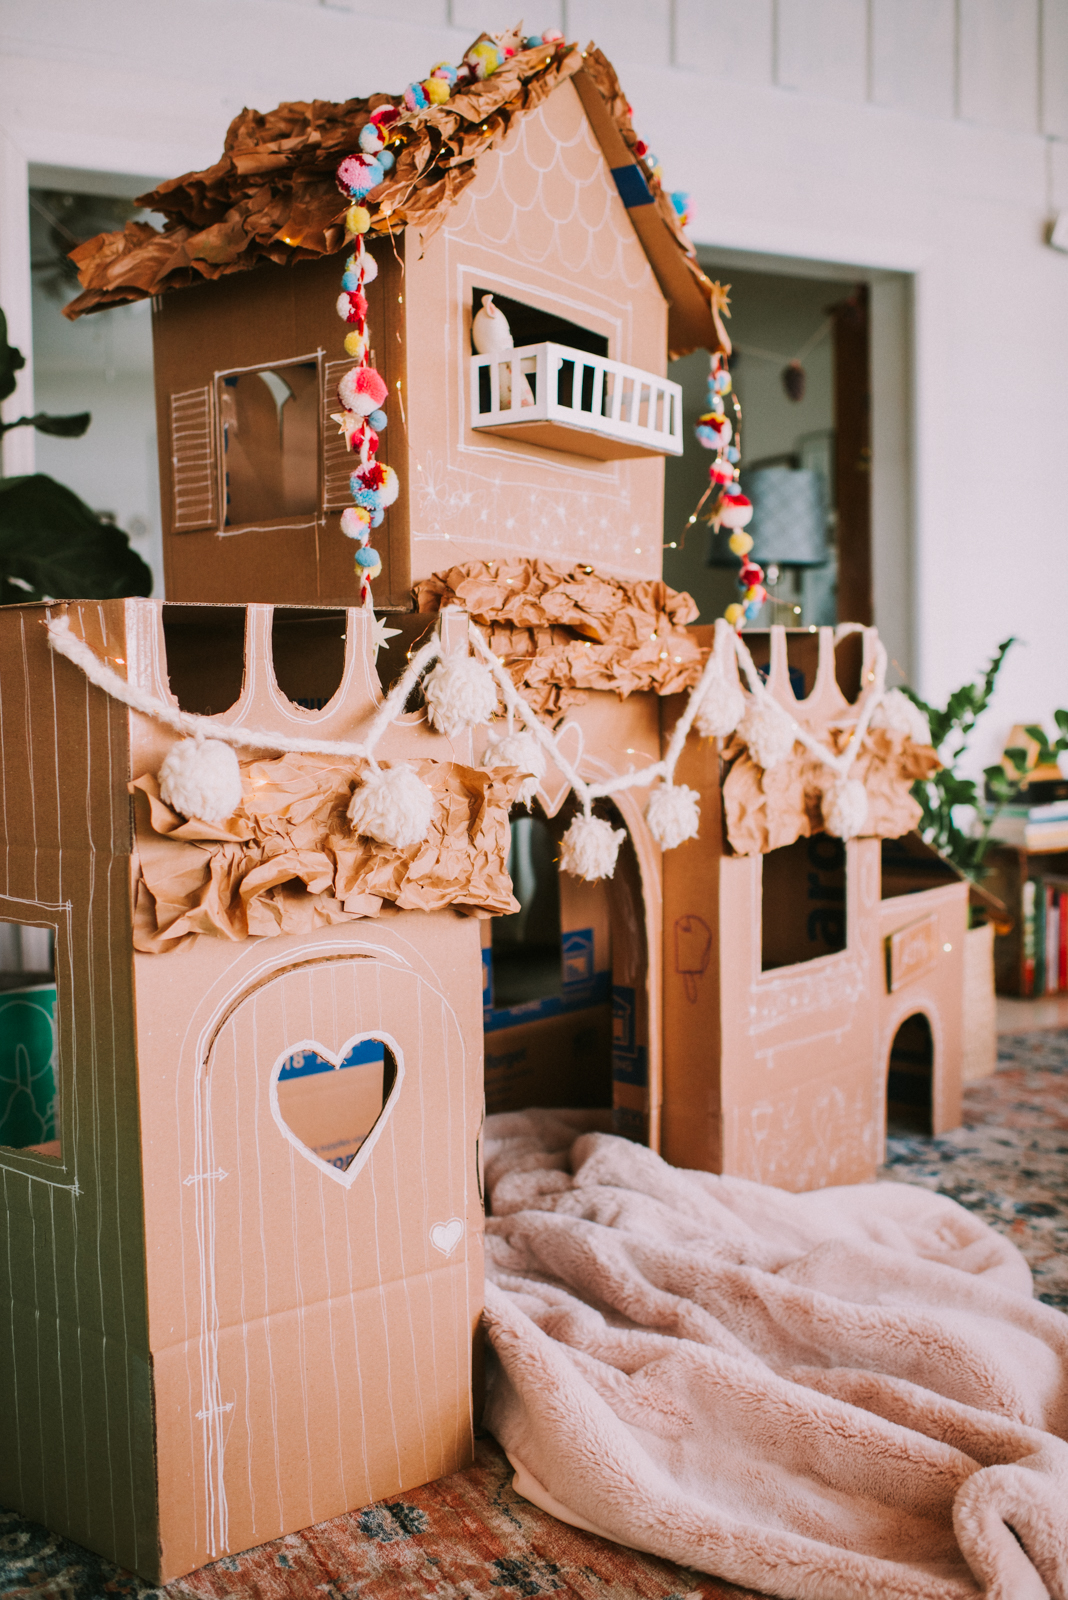
Don’t forget to grab some cozy blankets to make it all extra inviting! The perfect spot for reading a book or getting lost in their imagination!

The sky is the limit when it comes to creating your own personal cozy castle! Kids just love being able to see a plain cardboard box come to life as something they can inhabit, so don’t be afraid to just go for it, even if you keep it super simple!
June 30, 2020


")
freebies
We've created free resources and downloads just for you!! Be sure to check them out!
take me to the freebies!
Leave a Reply


View Comments +
+ Add A Comment