
a lifestyle blog about motherhood, intention, whimsical moments, and wellness
DIY Easter Eggs
")
DIY Easter Eggs
Lexi Wharem is a mother and photographer based in Lake Wales, Florida. She can be found on instagram sharing pieces of her life and work as she chases her dreams of being an visual storyteller.
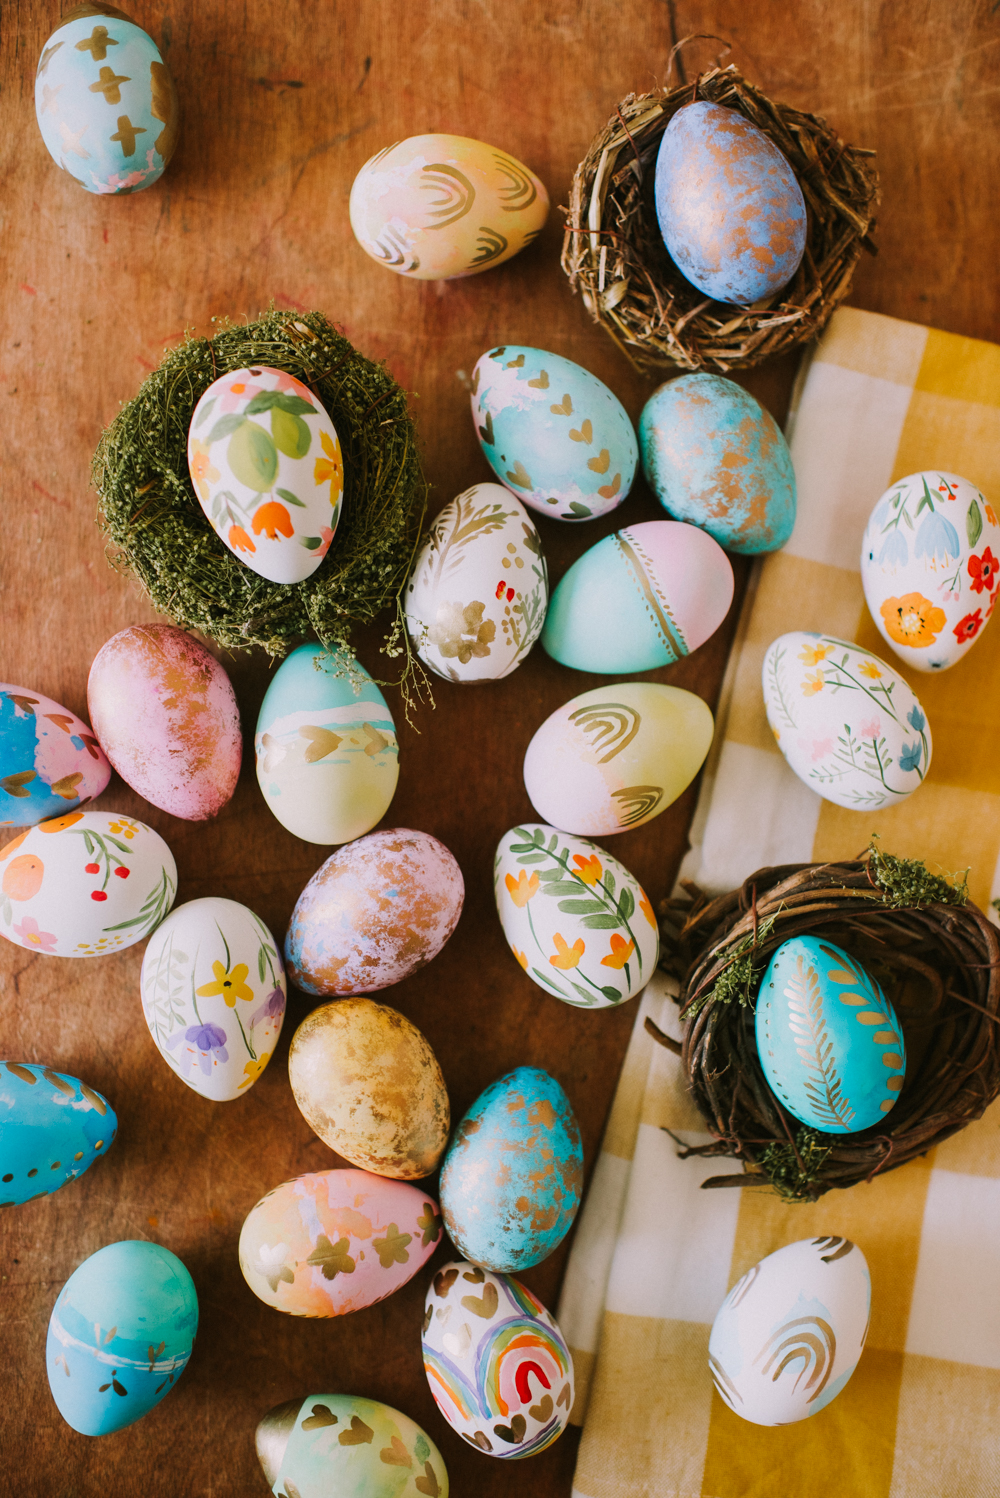
Decorating Easter eggs is one of those timeless traditions that my kids love every year, but as a creative mama I have always sort of dreaded it. Maybe I’ve always just needed to break free of the cheesy decorating kits and embrace a more artful approach, because after this DIY I am basically feeling like the Easter Bunny herself! I may or may not be stocking up on more eggs just so we can keep painting them until Easter!

Here are a few fun new techniques for you to try out with your crew!
DIY Easter Eggs
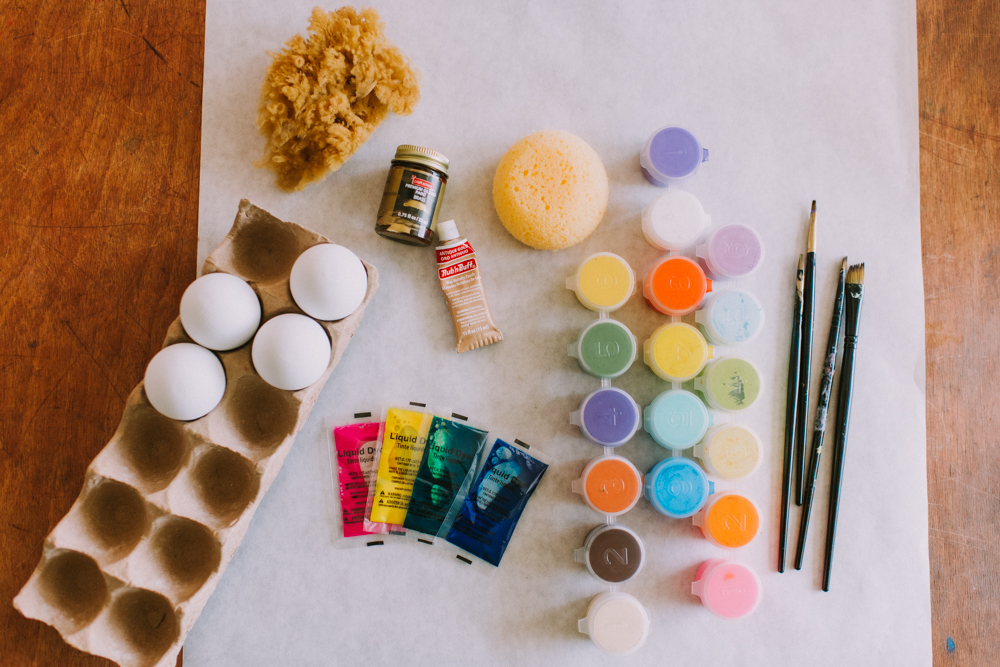
What You’ll Need:
- Eggs + dye – I used fake plastic eggs I found at Walmart
- Paint pots
- Gold guilding paint
- Rub ‘n Buff Wax Metallic Finish
- Sponges
- Brushes
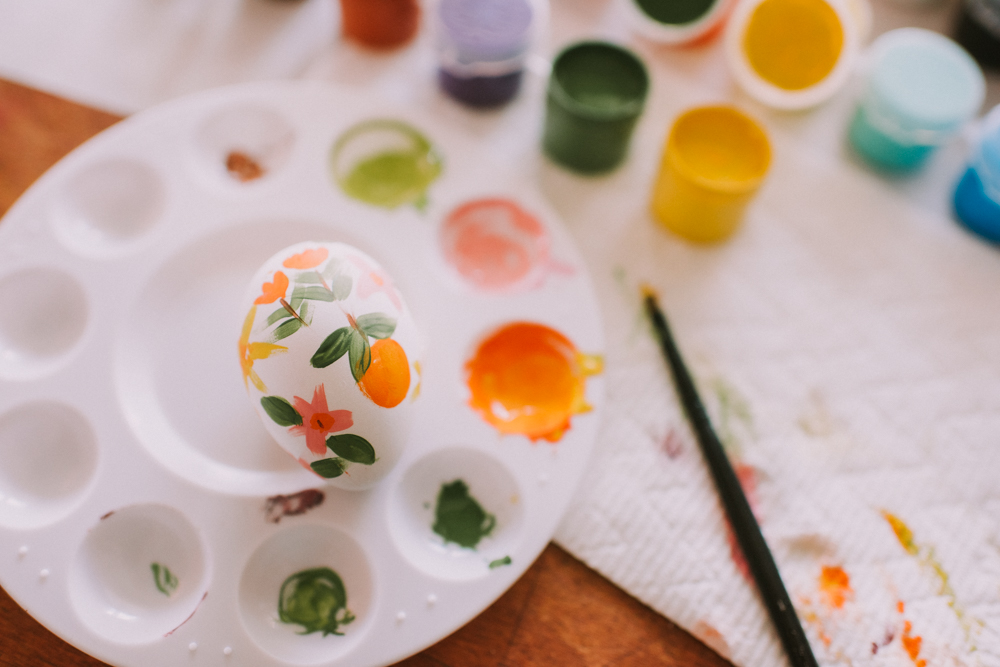
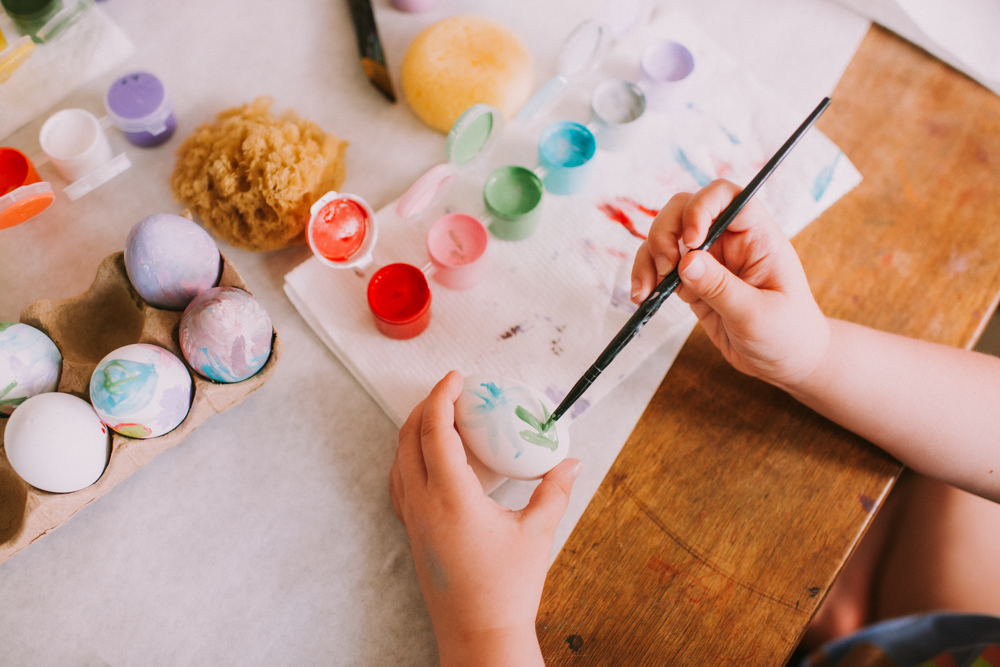
Step One: PAINTING
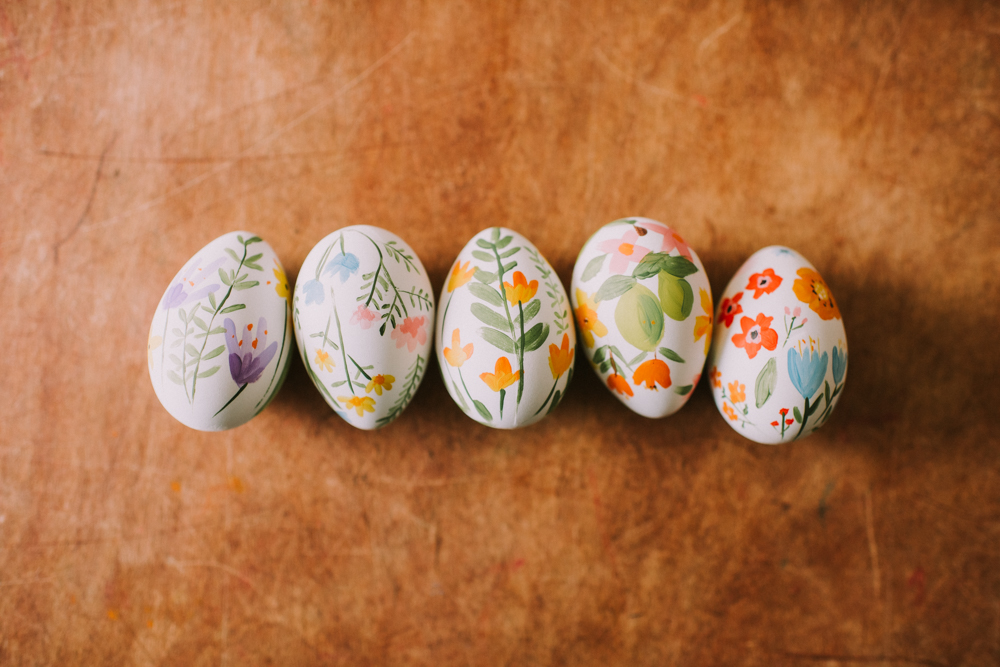
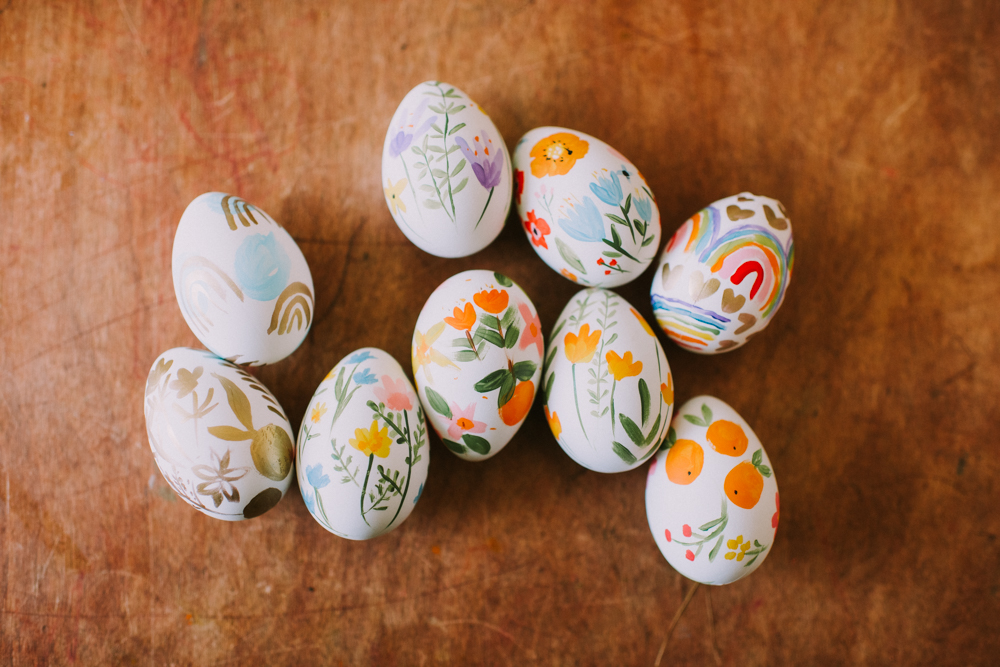
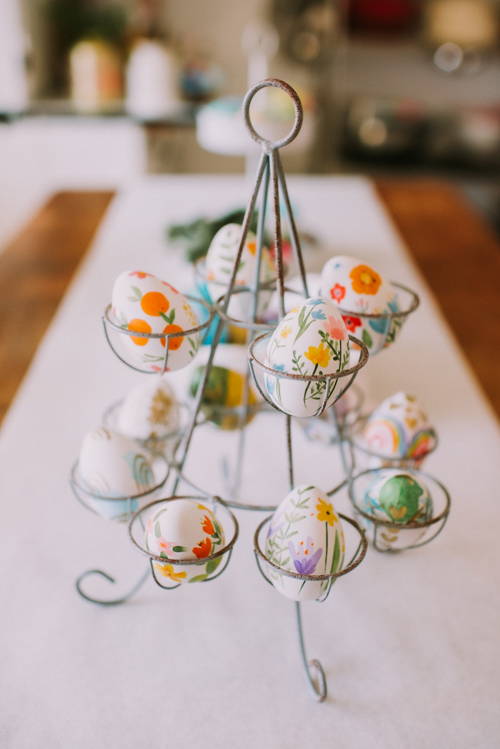
Set up your work area by covering your table with kraft paper or a throw-away tablecloth. Set out all your supplies, including your paint pots, a cup of water and some paper towels. Since I’ve been in spring mode I used Pinterest to find some botanical inspiration, then just filled in the rest as I went, mostly with hearts and rainbows because that’s what’s on repeat in my house with two girls!
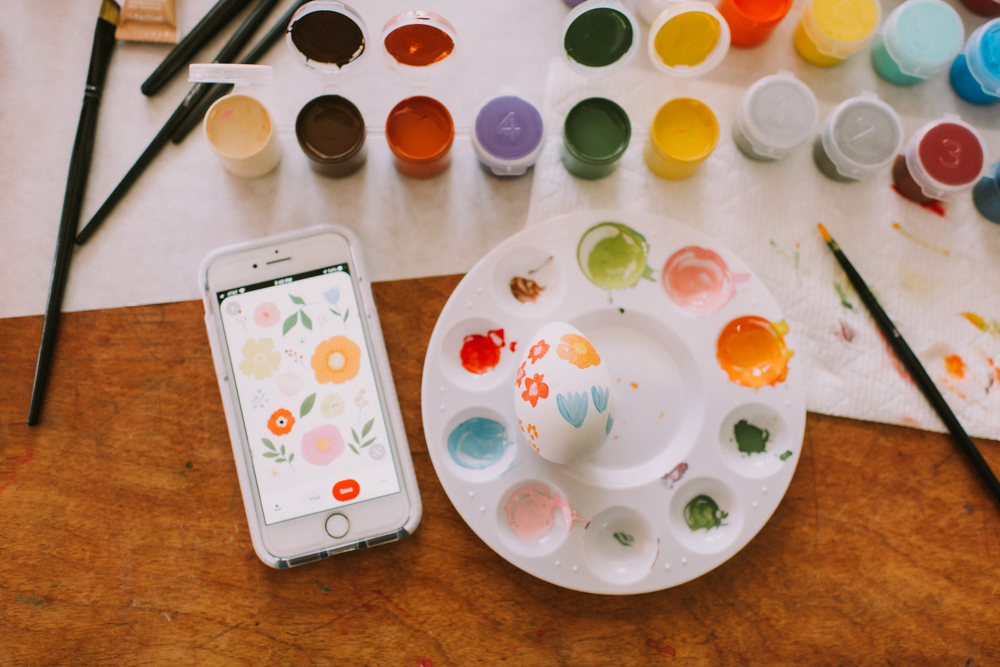
TIP: The trick is to keep your brush as dry as possible when applying the paint, so use your paper towel to dry the brush after you’ve washed it in between colors. Also, use the paint sparingly so that it will dry fast as you work.
This is fun and easy for kids, so be sure to have plenty of eggs on hand for everyone– paint and brushes, too! Encourage your kids (and yourself) to just go for it and not worry about mistakes!
Step Two: DYEING
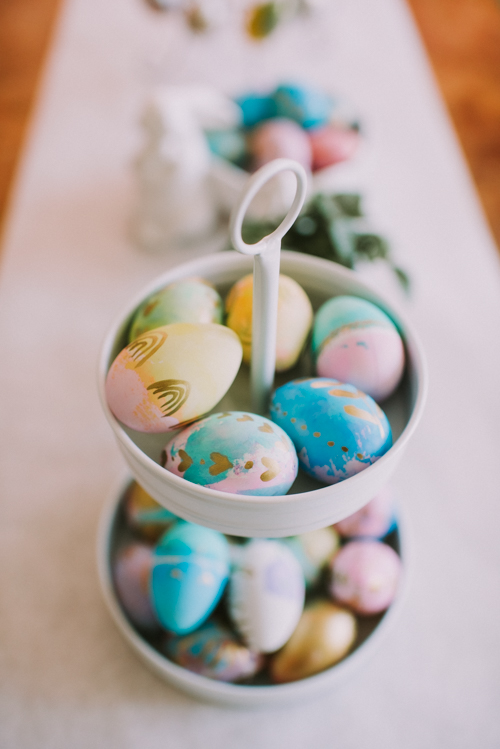
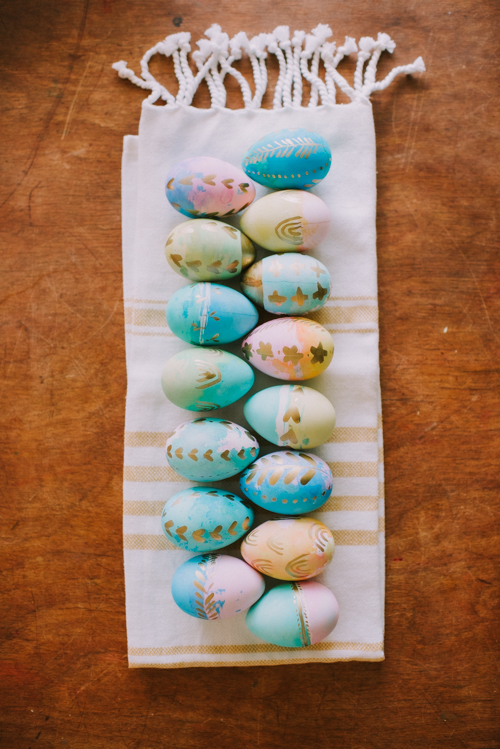
In the past I have detested the process of preparing real eggs for dyeing, the messy dye cups, and the fact that the pretty painted eggs don’t last long. I found inexpensive fake eggs at Walmart that came with dye packets, and although the process was still a little messy, it was worth it. The colors were easy to apply and mix and I love how close to real eggs they look!
TIP: I would suggest using ziploc bags instead of the thin bags that come with the kit, since mine tended to have holes and leak. After dropping a few drops of dye into your ziploc bag, dip your eggs into the bag and/or shake them around, until you achieve the look you want. It helped to dry the excess paint off the eggs gently with a paper towel after removing them from the bags.

Step Three: GO FOR GOLD
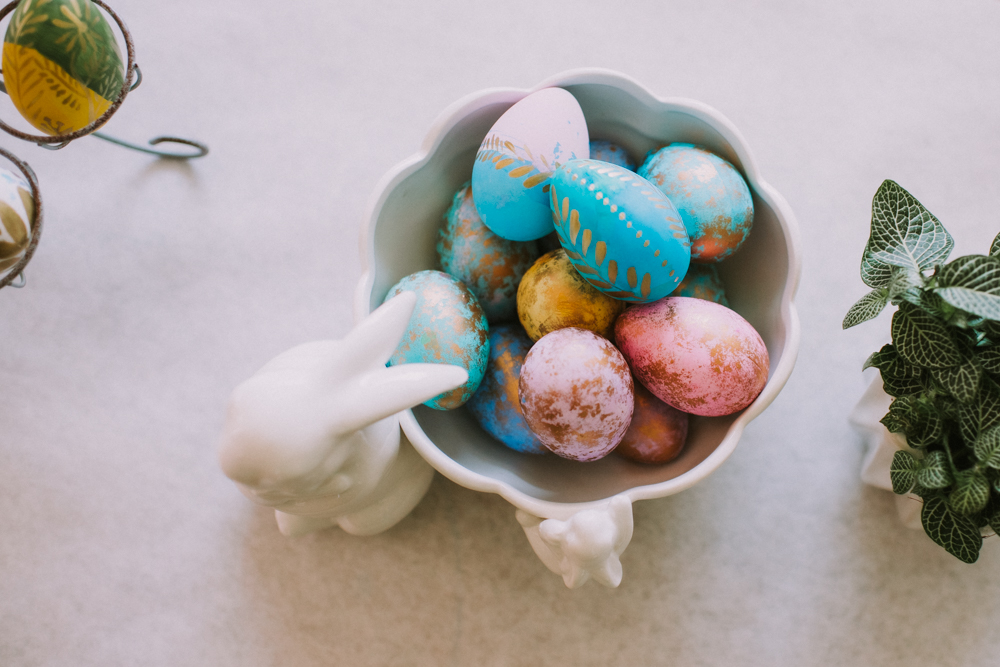
Friends, let me introduce you to your new best friend: LIQUID GOLD PAINT. I started by playing around with the gold paint on the dyed eggs, and I loved the shiny accents! I even took some of the eggs my girls had painted and dyed and added gold accents to them– instant collaboration! With some supervision I allowed them to paint a few of their own eggs with gold, too, and they LOVED it!
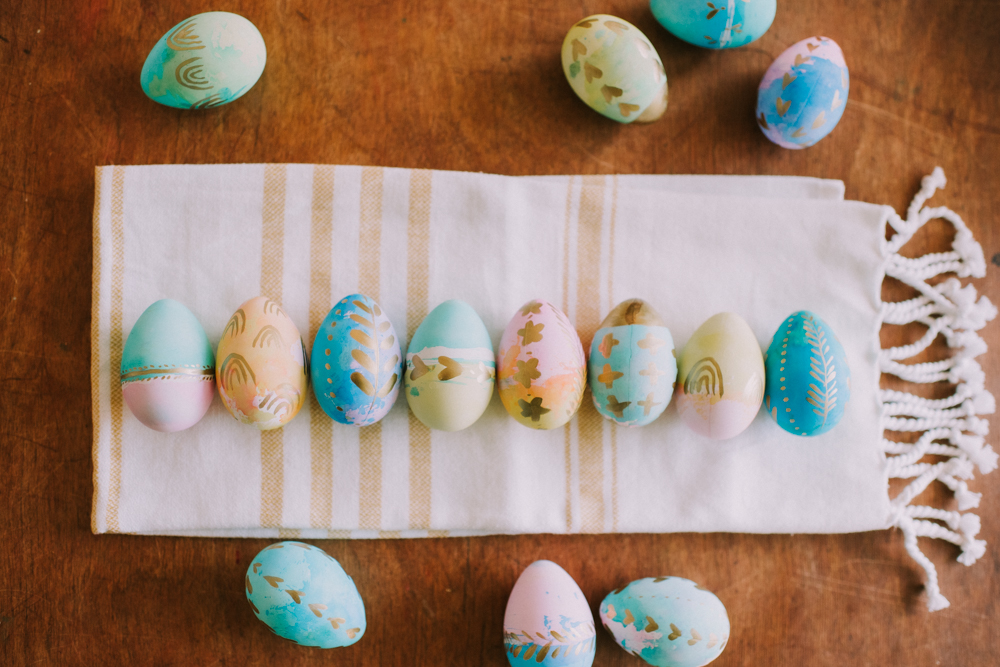
TIP: Shake the paint well and often because the ingredients can settle, and a little goes a long way!

Step Four: GOLD ANTIQUING
The last technique I used for my eggs was applying a gold antique finish. I have seen this everywhere, but never knew how to do it myself. This was a super simple process that involves using a sponge dipped into the wax metallic finish, then lightly brushing or dabbing the finish onto the eggs. You just keep applying until you’ve reached the desired look. So easy!

Don’t be afraid to think outside the box this year when it comes to decorating your Easter eggs! These techniques are really easy and the end products are beautiful pieces of art that you will display every year!
March 23, 2020


")
freebies
We've created free resources and downloads just for you!! Be sure to check them out!
take me to the freebies!
Leave a Reply


View Comments +
+ Add A Comment